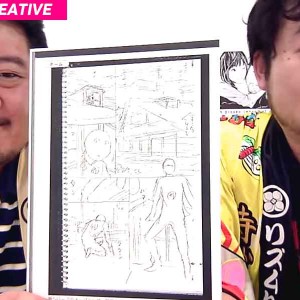
Manga fans, ciao! “Kakimoji SOS” had a facelift! From today, my weekly article series will be known as… “Manga SOS”! In this article series, I will continue to analyze Kakimoji, but also dig deep into the workings of manga as a whole to help you guys understand it better. “Make the manga interesting” … This is the biggest challenge, not only for manga creators, but manga editors also. In fact, being able to help a creator achieve this goal is a daily challenge for us editors. Throughout the series, I will introduce you to the various techniques I have picked up from manga sensei’s throughout my career, both as a manga fan and an editor. Also, if you have any burning questions relating to the areas I’ll cover, please fo not hesitate to contact me! First off, let’s take a look at something as integral to manga as paper ink…the “Koma-wari”, or panel layout. Manga is, like comic books the world over, sequential art. It’s a story told through images, housed in little boxes. The arrangement, size and composition of these boxes, or panels can determine exactly how a scene is played out, not to mention allows the creator to control the pace and emotion of the story. In Japanese, this is known as “Koma-wari”. REMEMBER: The ability to accurately understand Koma-wari can make or break your manga, so let’s shine a spotlight on this vital part of the manga process and have you paneling like a pro!  “Rough” is a page with a small number of panels bold. “Dense” is a page with many panels, containing a lot of information. There is no fixed rule for the number of frames per page, or how you use them. However, it is advisable to set plan three to seven, no more or less.
  It is also advisable to space out the densely panelled pages. When a reader is presented with pages, bursting with panels, they may tire easily and loose interest in the story. This is all dependent on the story, but try to avoid monotonous panelling if possible. By choosing a rough panelling approach at the start of the manga, to then dense in the middle, followed by rough at the end will make your manga easily digestible and allow you to effectively tell the story in a dynamic way.
  In Japanese manga (and books), the reading order is from RIGHT to LEFT. If the four panels are evenly laid out like in the example above, you will find it very hard to manipulate the reader into reading in your intended order. Where would they start?!
  So let’s take a look at panelling done tight. In the above example, we have a the top two evenly laid out, but then a larger third panel, rushing into a smaller panel at the end. By arranging the panels like this, we have created an almost effortless, subconscious running order (made even more explicit with the action you fill the panels with!) Next week, I will dig deeper into paneling techniques, while also presenting you with some concrete examples from our (MINE!) beloved Hara sensei! See you next week! CIAO!!!
FOLLOW ME for more Kakimoji and manga tips! Twitter Facebook …and remember to use the hashtag #mangasos 😉
- Law of Framing – Part 1 – “Dense and Rough”
- Rough and dense
 “Rough” is a page with a small number of panels bold. “Dense” is a page with many panels, containing a lot of information. There is no fixed rule for the number of frames per page, or how you use them. However, it is advisable to set plan three to seven, no more or less.
 - Flow per episode
 It is also advisable to space out the densely panelled pages. When a reader is presented with pages, bursting with panels, they may tire easily and loose interest in the story. This is all dependent on the story, but try to avoid monotonous panelling if possible. By choosing a rough panelling approach at the start of the manga, to then dense in the middle, followed by rough at the end will make your manga easily digestible and allow you to effectively tell the story in a dynamic way.
 - Manipulate the reader’s eye
(Bad example)
 In Japanese manga (and books), the reading order is from RIGHT to LEFT. If the four panels are evenly laid out like in the example above, you will find it very hard to manipulate the reader into reading in your intended order. Where would they start?!
 (Good example)
 So let’s take a look at panelling done tight. In the above example, we have a the top two evenly laid out, but then a larger third panel, rushing into a smaller panel at the end. By arranging the panels like this, we have created an almost effortless, subconscious running order (made even more explicit with the action you fill the panels with!) Next week, I will dig deeper into paneling techniques, while also presenting you with some concrete examples from our (MINE!) beloved Hara sensei! See you next week! CIAO!!!
 FOLLOW ME for more Kakimoji and manga tips! Twitter Facebook …and remember to use the hashtag #mangasos 😉


